
Whittling has been a cherished pastime for centuries. Diving into beginner whittling projects can be fulfilling and fun for those interested in this art. In this guide, you’ll discover free whittling patterns, easy ideas, and essential wood carving tips for beginners to start your first carving adventure.

What Is Whittling? A Beginner’s Introduction
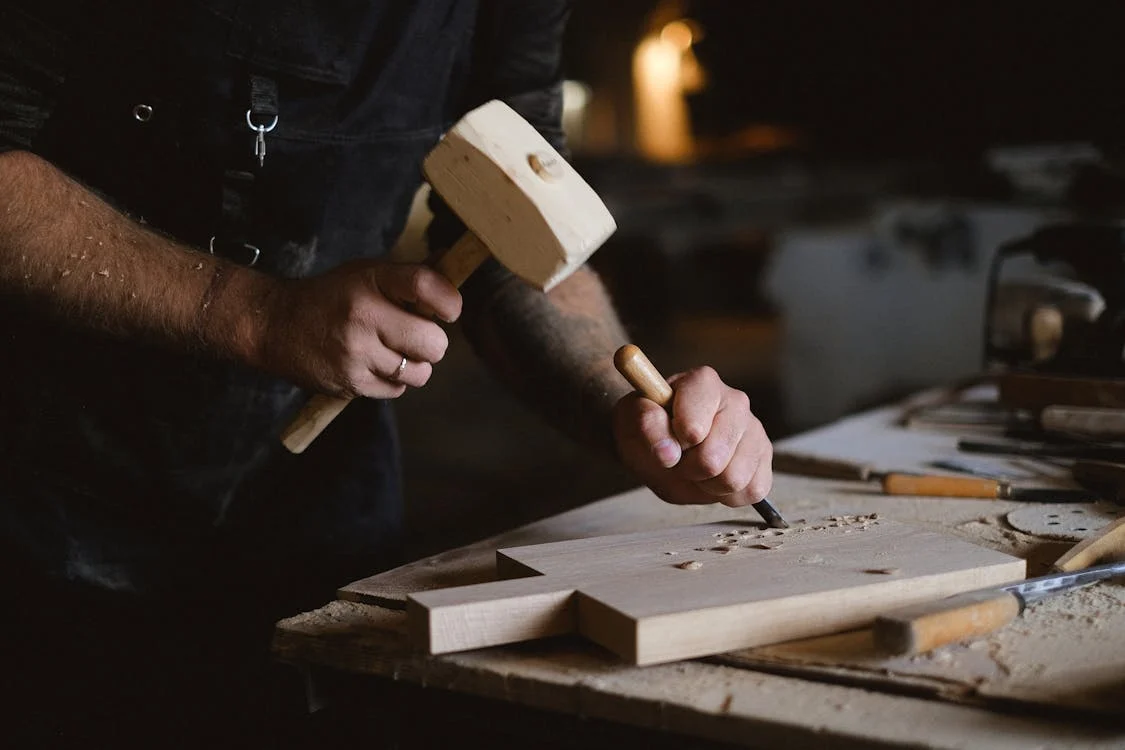
Whittling is the art of carving shapes or patterns from wood using a knife. It’s a craft that doesn’t require complex tools, which is perfect for beginners. Whittling stimulates creativity and improves focus, patience, and an escape from daily life. This hobby has a rich history, often linked to rural traditions and moments of quiet relaxation.
Tools You’ll Need to Get Started
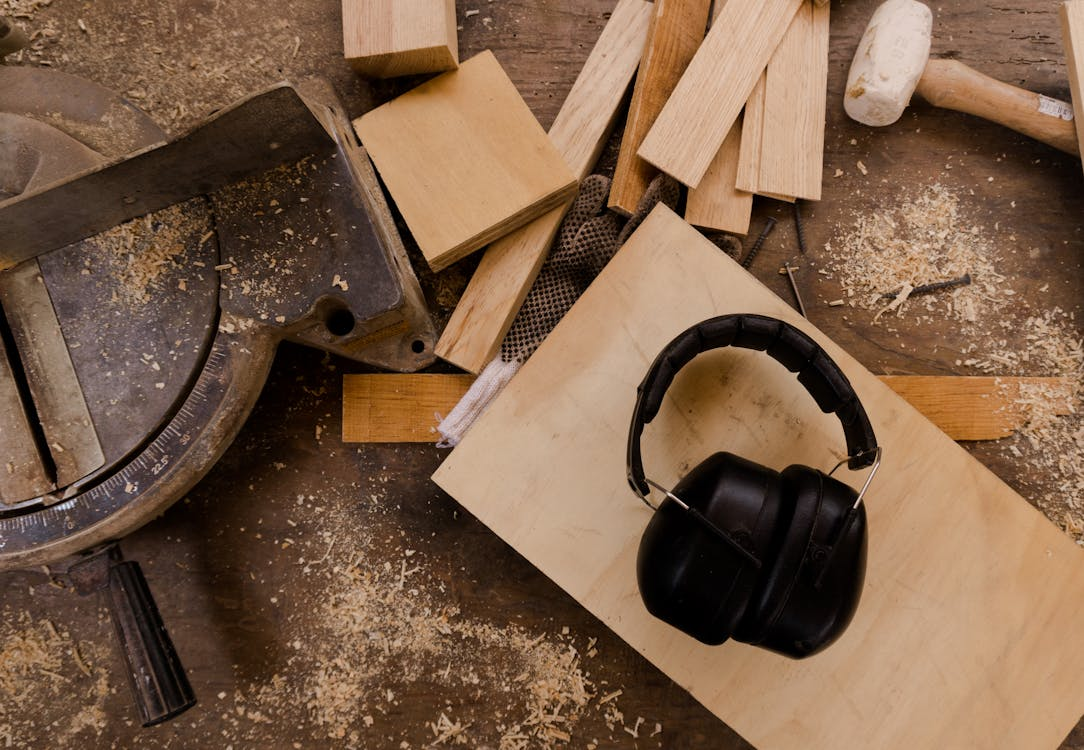
When diving into whittling, equipping yourself with the right tools is a crucial first step. These essentials ensure safety and precision while allowing you to focus on your creativity:
-
Whittling knife. A reliable knife is every whittler’s cornerstone. Beginners should invest in a high-quality whittling knife designed for detailed carving. The carving Yakut knife stands out as a top choice, offering exceptional control and sharpness. For those exploring complex patterns, specialty knives with curved or angled blades can be considered later.
-
Safety gloves. To protect your hands, cut-resistant gloves are a must. Choose gloves that balance protection and flexibility, ensuring comfort without compromising safety.
-
Sharpening tools. A sharp blade glides effortlessly through the wood. Keep a sharpening stone or strop on hand for regular maintenance. Dull knives not only make carving harder but also increase the risk of slips and accidents.
-
Sandpaper. Finishing your project with fine-grit sandpaper enhances its appearance, smoothing out rough edges and giving it a polished look. Sandpaper is especially helpful for beginner projects, making even minor imperfections less noticeable.
-
Wood stabilizer (optional). For those working with softer woods prone to splitting, a wood stabilizer can strengthen the material, making the carving process smoother and more controlled.
Gathering these tools sets the stage for an enjoyable and productive whittling experience. The right equipment makes the task easier and inspires confidence, helping beginners embrace this timeless craft.
What Kind of Wood Is Best for Whittling?
Selecting the right wood is essential for a smooth whittling experience, especially for beginners. Softwoods are generally preferred due to their ease of carving and minimal tool wear. Among the popular choices:
-
Basswood. This wood is a top pick for its fine grain and soft texture, making intricate details effortless. Basswood is widely used in beginner projects, from simple shapes to advanced designs.
-
Pine. Pine is affordable and readily available, and it is ideal for practice. While it’s easy to carve, its grain can sometimes be unpredictable, offering a chance to improve control.
-
Cedar. Beyond its smooth carving experience, cedar's pleasant aroma adds a sensory delight. It’s also durable and resistant to decay, perfect for outdoor pieces like garden ornaments.
Other softwoods, such as butternut and balsa, are also excellent for carving. However, beginners should avoid hardwoods like oak or maple, as their density demands advanced skills and specialized tools.
When choosing your wood, inspect the grain for uniformity and avoid pieces with knots, as they can complicate the carving process. The right wood sets the stage for an enjoyable and rewarding whittling adventure.
Personalizing Your Whittling Projects
Adding personal touches to your whittling projects can elevate them from simple carvings to cherished keepsakes. Personalization might include carving initials, special dates, or designs that hold meaning. For example, a heart or flower motif can turn a basic wooden keychain into a thoughtful gift.
You can also experiment with staining or painting your finished pieces to enhance their visual appeal. These details add character and hone your skills in intricate carving.
Beginner Whittling Patterns Available for Free
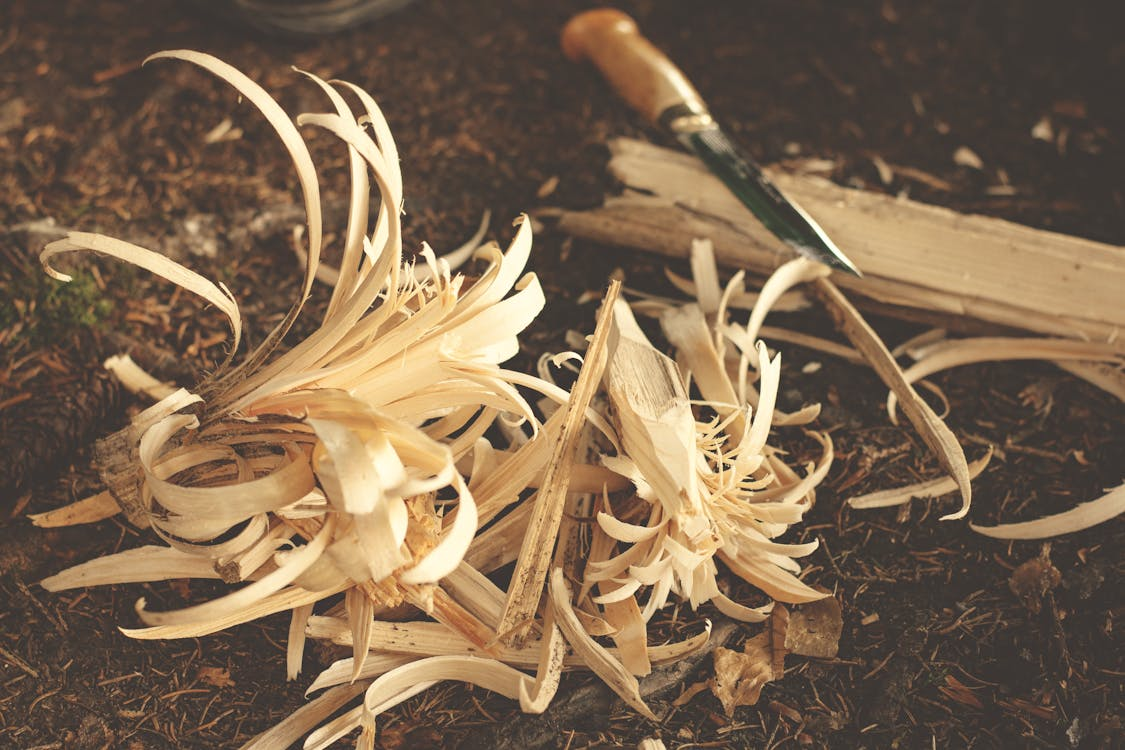
Starting with simple, free whittling patterns for beginners helps build confidence and develop essential skills. Whittling's beauty lies in its endless creative possibilities, but choosing easy-to-follow patterns can make the journey smoother and more enjoyable for beginners. Here are a few beginner-friendly options and some practical advice for each.
Simple Animal Designs: Birds, Fish, and Bears
Carving animal figures is an ideal way to practice creating recognizable shapes and smooth edges while having fun. Begin with these approachable, creative wood carving designs:
-
Birds. Start by drawing a simple bird outline on a block of softwood. Focus on achieving clean, rounded edges for the wings and body. Beginners can keep it basic, while more confident whittlers may add details like feathers or beaks. These small carvings also make charming ornaments or gifts.
-
Fish. The streamlined shape of a fish is excellent for practicing symmetry. Use your knife to create gentle curves for the body and distinct cuts for the fins and tail. You can experiment with different species, like a simple trout or a sleek goldfish.
-
Bears. A bear carving, especially in a blocky style, is a perfect project for beginners to practice angled cuts and shapes. Start with the bear's body and add simple features like ears and a snout. You can refine details such as fur texture or facial expressions as you improve.
Animal carvings test your ability to balance precision and creativity. There is plenty of room for beginners to adapt and personalize using whittling patterns.
Geometric Shapes and Abstract Patterns
Geometric and abstract designs are another fantastic option for beginner whittlers. These projects are less about realism and more about honing your knife skills:
-
Triangles and diamonds. Repeated geometric shapes like triangles or diamonds can form patterns that resemble tribal designs or decorative panels. These projects help build muscle memory for making consistent cuts.
-
Abstract swirls. With abstract designs, you explore flowing, organic lines without following strict rules. These carvings can serve as artistic decorations or bases for more detailed projects as you gain experience.
-
Tiling projects. Experiment with small tiles carved with different geometric patterns. Once complete, they can be arranged to create a unique mosaic.
These projects teach the importance of knife control, attention to detail, and the satisfaction of seeing patterns come together piece by piece.
Seasonal Whittling Ideas
Celebrate special occasions by carving decorations and gifts that suit the season. These beginner whittling ideas add a festive flair to your whittling repertoire:
-
Christmas. Miniature Christmas trees, stars, and snowflakes are simple yet elegant holiday decorations. You can also carve small figurines like Santas or reindeer to create a miniature winter scene.
-
Halloween. Pumpkins and bats are popular choices for wood whittling ideas for beginners, with the option to carve faces into the pumpkins for a spooky jack-o'-lantern effect. Skulls or witches' hats are also fun for those seeking a challenge.
-
Easter. Egg-shaped carvings and bunny figurines are perfect for springtime crafts. You can leave them natural or paint them in bright, cheerful colors to match the season.
These whittling ideas for beginners provide opportunities for practicing your skills. Share your creations with friends and family, spreading the joy of the holidays.
Decorative Items with Simple Patterns
For those looking to combine artistry with utility, try carving everyday items with decorative patterns:
-
Wooden coasters. Start with a flat, circular piece of wood and carve patterns like concentric circles or floral designs. These make excellent handmade gifts.
-
Picture frames. Carve the borders of a wooden frame with swirls, vines, or geometric patterns to add a personal touch to your home décor.
-
Bookmarks. Thin wooden strips can be transformed into unique bookmarks by carving simple designs or engraving initials.
Easy Beginner-Friendly Wood Projects
Once you’ve practiced basic patterns, move on to these whittling projects for beginners that combine creativity and functionality.
Step-by-Step Guide: Whittle a Wooden Spoon
-
Select wood. Use a softwood block, such as basswood, for your undertaking. It’s easy to carve and holds its shape well. Ensure the block is large enough to carve both the spoon bowl and handle because you want your spoon to be functional when completed. A block around 1-2 inches thick should work well for a beginner easy whittling project.
-
Outline the shape. Sketch the spoon’s outline on the block using a pencil. A simple oval shape works for the bowl, while the handle can taper gradually towards the base. Use light, adjustable lines so you can make changes as you carve. It’s a good idea to visualize how the spoon will fit in your hand, making the handle comfortable and ergonomic.
-
Carve the bow. Start by making precise cuts to carve the bowl. To prevent eliminating too much material all at once, start the curve shallow and work your way deeper. If you work gently, the curvature will be even and smooth. Be patient and keep making gradual cuts until you reach the depth you want. Carving the bowl in phases is frequently simpler, and you can check the shape often to ensure it's even.
-
Shape the handle. For the handle, carve carefully, focusing on symmetry and comfort. Gradually taper the handle from the base towards the spoon's neck. A tapered handle adds aesthetic appeal and ensures a comfortable grip. Pay attention to the natural flow of the wood, and use gentle cuts to shape the handle’s curves.
-
Polish. Once the carving is complete, sand the spoon for a smooth and refined finish. Start with medium-grit sandpaper and move to finer grades to remove rough patches. If you plan to use the spoon for cooking, apply a food-safe oil or beeswax to enhance the wood’s appearance and protect it from moisture.
Creating a Simple Wooden Figurine
-
Choose a design. Begin with a basic figure, such as a penguin or a gnome. Because they use simple geometric shapes and are simple to carve, these whittling beginner projects are ideal for novices. As you work on the specifics, a simple design also allows for greater creativity, so pick something that will motivate you and be doable for your degree of expertise.
-
Carve in layers. To create the figure's basic outline, start by making crude cuts. Before fine-tuning the shape, cut away huge chunks of wood with a carving knife. By starting with larger cuts, you can avoid making mistakes that are hard to fix later, and layering helps maintain proportions. To make the figurine come to life, concentrate on carving out details like textures or facial features after the basic shape is complete.
-
Smooth and finish. After the rough shape is carved, sand and polish the figurine for a smooth, professional finish. This step removes any tool marks and sharp edges. If desired, you can also paint the figurine to add extra character. For a polished and vibrant look, consider using acrylic paints or natural wood finishes to protect the figurine and enhance its appearance.
Making a Rustic Keychain or Pendant
-
Pick a small block. For this project, opt for wood that’s easy to carve, such as basswood or cedar. A small block, around 1-2 inches, works well. Since you’re working on a compact project, you’ll have the flexibility to experiment with different shapes and designs. This project is perfect for practicing more detailed cuts while creating something functional.
-
Shape the design. Whittle a heart, leaf, or other small object. These shapes are ideal for beginners because they offer a simple form with curves and details that can be easily refined. Start by outlining the basic shape of the wood block and then make gradual cuts to bring it into form. With each pass, you’ll become more comfortable with your tools and refine the edges of your design.
-
Drill a hole. Once your shape is carved, use a small drill to create a hole at the top of the design, making sure it is centered for balance. This hole will be used to attach a keychain ring or pendant cord. Make sure the hole is big enough for the hardware but not so large that it compromises the structure of the design. Drilling carefully will ensure the piece remains intact, making it one of the great whittling ideas for beginners.
-
Finish. After carving and drilling your keychain or pendant, sand the surface to remove rough spots and achieve a clean, polished finish. Use fine-grit sandpaper for a smooth finish. If you want a more rustic or natural look, leave the wood unpainted or apply a light coat of wood stain. You can also try painting or adding other ornamental components to make your creation more unique.
Rustic keychains and pendants are excellent beginner projects that combine functionality and creativity.
Tips and Tricks for Beginner Whittlers
-
Keep your knife sharp. A dull knife requires more force and increases the risk of accidents. Regularly sharpen your knife using a sharpening stone, strop, or a dedicated tool. With a sharp blade, your cuts are more precise and controlled. A sharp knife will glide through the wood with less effort, allowing you to make cleaner, more accurate incisions.
-
Carve away from yourself. Always cut away from your body for safety. Keep your hands and fingers away from the knife's path to avoid accidents. Develop a secure grip on both the wood and your carving tool and maintain control throughout the process. The best practice is to carve at a comfortable angle where the blade naturally moves away from your body and other vulnerable areas.
-
Take breaks. Avoid hand fatigue by carving in short, focused sessions. Extended carving can strain your hands, wrists, and fingers, especially if you're using repetitive motions. Stretching your fingers and wrists periodically is crucial to maintain flexibility and avoid discomfort. Taking breaks not only prevents physical fatigue but also helps you approach your project with fresh eyes, especially when following whittling patterns step-by-step.
-
Practice patience. Mastering whittling takes time and dedication. It’s essential to approach each project with the mindset that improvement comes with practice. Focus on progress, not perfection, and recognize that every carve brings you closer to your goal. Whittling is as much about the process as the final product. To stay motivated, celebrate small victories, such as carving a smooth curve or completing a project section.
-
Work in good lighting. Proper lighting is crucial for seeing the fine details of your work clearly and reducing eye strain. Poor lighting can lead to mistakes, as it’s harder to gauge your cuts and the wood’s grain. Work in a well-lit area where the light casts minimal shadows on your project. Natural light is often best, but if you’re carving indoors, use bright, adjustable lights that can be positioned to shine directly on your workspace.
Common Beginner Tools for Whittling
A successful start to whittling necessitates the proper instruments. The table below lists common starter tools, their purposes, and estimated prices to help newbies identify the appropriate equipment for their needs.
|
Tool |
Use |
Approximate Cost |
|
Whittling knife |
General carving and shaping of wood |
$10 - $30 |
|
Detail knife |
Creating fine details and intricate cuts |
$15 - $40 |
|
Hook knife |
Carving spoons, bowls, and rounded objects |
$20 - $50 |
|
Chip carving knife |
Making geometric patterns and designs |
$15 - $40 |
|
Carving Yakut knife |
Carving larger wooden pieces with precision |
$40 - $80 |
|
Sandpaper |
Smoothing carved surfaces |
$5 - $15 (per pack) |
|
Sharpening stone |
Keeping blades sharp for precise carving |
$10 - $30 |
|
Gloves or thumb guard |
Protecting hands from accidental cuts |
$10 - $20 |
|
Wood blocks (basswood) |
Ideal wood for beginners due to softness |
$5 - $20 (per piece) |
Benefits of Whittling for Beginners
Whittling involves far more than simply wood carving; it's a means to express creativity, practice mindfulness, and build skills. For beginners, this hobby provides numerous benefits and the ability to create tangible works of art.
1. Stress Relief and Relaxation
Whittling can serve as a therapeutic escape from the hustle and bustle of daily life. The rhythmic motion of carving, coupled with the tactile sensation of wood in hand, encourages relaxation and reduces stress. Beginners often find the process meditative, helping them focus on the present moment while letting go of worries.
2. Low Barrier to Entry
Unlike many hobbies requiring significant equipment or materials investment, easy whittling projects for beginners are affordable and accessible. A simple pocketknife and a block of softwood are all a beginner needs to get started. This low-cost entry point makes whittling an inviting craft for anyone curious about working with their hands.
3. Improved Focus and Patience
Whittling teaches beginners the value of patience and precision. Every cut requires attention and care, fostering a sense of discipline. Over time, this focus extends beyond carving, helping individuals improve their ability to concentrate in other areas of life.
4. Creative Expression
For those new to crafting, whittling offers a hands-on way to explore creativity. Beginners can start with basic shapes and gradually move to more intricate, creative wood carving designs, developing their unique style as they progress. The simplicity of the medium has limitless possibilities for imagination.
5. Connection with Nature
Whittling also fosters a deeper appreciation for nature. Working with wood — an organic, natural material — helps beginners connect with their environment and understand natural resources' textures, grains, and beauty.
6. Building Confidence and Achievement
Whittling provides a sense of accomplishment, especially for beginners who may initially feel unsure about their abilities. As they transform a simple block of wood into a recognizable object, they build confidence in their skills and creativity. No matter how small, each completed project becomes a testament to their effort and growth.
Common Mistakes to Avoid When Starting Whittling
-
Using hardwoods. When starting out, beginners should avoid dense hardwoods like oak, maple, or hickory. These woods are tough and require more effort to carve, which can be frustrating for someone still getting the feel of the craft. Hardwoods also increase the risk of tool slippage and mistakes due to their resistance to carving tools. Instead, focus on softwoods such as basswood, pine, or cedar, which are easier to carve and more forgiving, making them perfect for practice.
-
Skipping safety gear. Never underestimate the importance of safety when whittling. While whittling may seem like a simple activity, it involves sharp whittling tools for beginners that can cause serious injuries if mishandled. Always wear protective gear such as cut-resistant gloves to prevent accidental slips and cuts. Additionally, use a carving glove or thumb guard to protect your non-cutting hand from unintentional contact with the blade.
-
Carving without a plan. Carving without a clear strategy can lead to frustrating mistakes and wasted time. When working on a spoon, figurine, or any other project, always take time to sketch your design or visualize the shape you want to create. Mapping out the steps and overall shape beforehand will help you stay focused and reduce errors. Using easy carving patterns can be a great way to start, as they provide a clear outline and guide for your project.
-
Over-carving. Knowing when to stop is one of the most critical skills in whittling. It’s easy to get carried away, thinking that more carving will improve the design, but over-carving can lead to mistakes, an imbalanced piece, or even a weaker structure. Step back and assess your work once you’ve achieved the shape or details you were aiming for. Sometimes, less is more. To ensure precision and control throughout the process, it’s important to use the right tools, so make sure to follow whittling knife recommendations for beginners.
Beginner Whittling Projects FAQ
What is the easiest whittling project for beginners?
Easy whittling projects for beginners include carving a basic stick or a simple geometric shape like a cube, cone, or triangle. These shapes are a great way to get comfortable with your tools and develop hand control. As you gain confidence and skills, you can progress to slightly more complex projects, such as small animal figures, like birds or fish, or functional items like a spoon or a keychain.
Is whittling a safe hobby for beginners?
Yes, whittling is a safe hobby for beginners as long as proper precautions are taken. Safety should always come first, especially when working with sharp tools. Start by using a sharp, well-maintained knife, as dull knives can slip and cause accidents. Always wear protective gloves, preferably cut-resistant ones, to minimize the risk of injury. Make sure to carve in a well-lit, stable environment where you can control your tools completely.
How do I sharpen my whittling knife?
Sharpening your whittling knife is crucial to maintaining its effectiveness and safety. Start by using a sharpening stone or strop designed for knives. When sharpening, maintain a consistent angle of about 20 degrees, and move the knife along the stone in smooth, controlled strokes. Pay attention to both sides of the blade to ensure even sharpening, especially when working on simple whittling ideas.